
Hello :D
I really want to share with you my method of making a zipper pouch. It is not very different from many others tutorials but has a few more added tipbits to help you make the perfect pouch.
I hope you find it easy to follow, this is a guide on how to make a zipper pouch. Its up to you what size, shape and pouch design you would like to make.

Supplies or What You Will Need
♥ Exterior Fabric
♥ Lining Fabric
♥ Interfacing
♥ Zip/Zipper
♥ Sewing Machine
♥ Zipper Foot
♥ Thread
♥ Wonderweb or similar
♥ Pouch Pattern (with seam allowance)
1. Cut your pattern from the exterior fabric, lining fabric and interfacing and decide on your zip length.

2. Attach interfacing to exterior fabric. I use stitch and tear and attach interfacing to the fabric with wonderweb at the top only.

3. Place your zipper teeth faced down onto the rightside of your exterior fabric.
Tip: always make sure your zipper works and that it is long enough that the zipper pull will not get in the way of your zipper foot when sewing.

Then place your lining fabric on top of the zipper. Your zipper will be in a fabric sandwich. I tack the layers together rather than using pins. When sewing it gives a much straighter stitched line.

4. Once the exterior and lining are tacked in place on the zipper. Use your zipper foot to stitch about halfway between the teeth and the edge of the fabric and zip. Any closer to the zipper teeth and the zipper will get caught in the lining fabric.

5. Repeat steps 3 and 4 with the other side of the pouch. It should look like the pictures below.


6. Open the zipper about 2/3rd down before you pin it together.

7. Next bring the two exterior layers together and the two lining fabrics together. At this point its important to match up all the edges of the fabric and also the straight edges sewn to the zipper. This will make the zipper more even when right side out later.

Before you pin everything together make sure that your zipper teeth point toward the lining fabric.


With your edges of the fabric and zipper lined up with each other pin through the zipper and fabric layers, then pin each end of the zipper together so they stay flat when sewing.
Pin the rest of the pouch leaving a gap in the bottom of the lining fabric so you can turn it inside out later.
Start at the beging of the gap use a backstitch to secure the thread, sew around the pouch (red dots as a guide) ending with another backstitch by the gap.
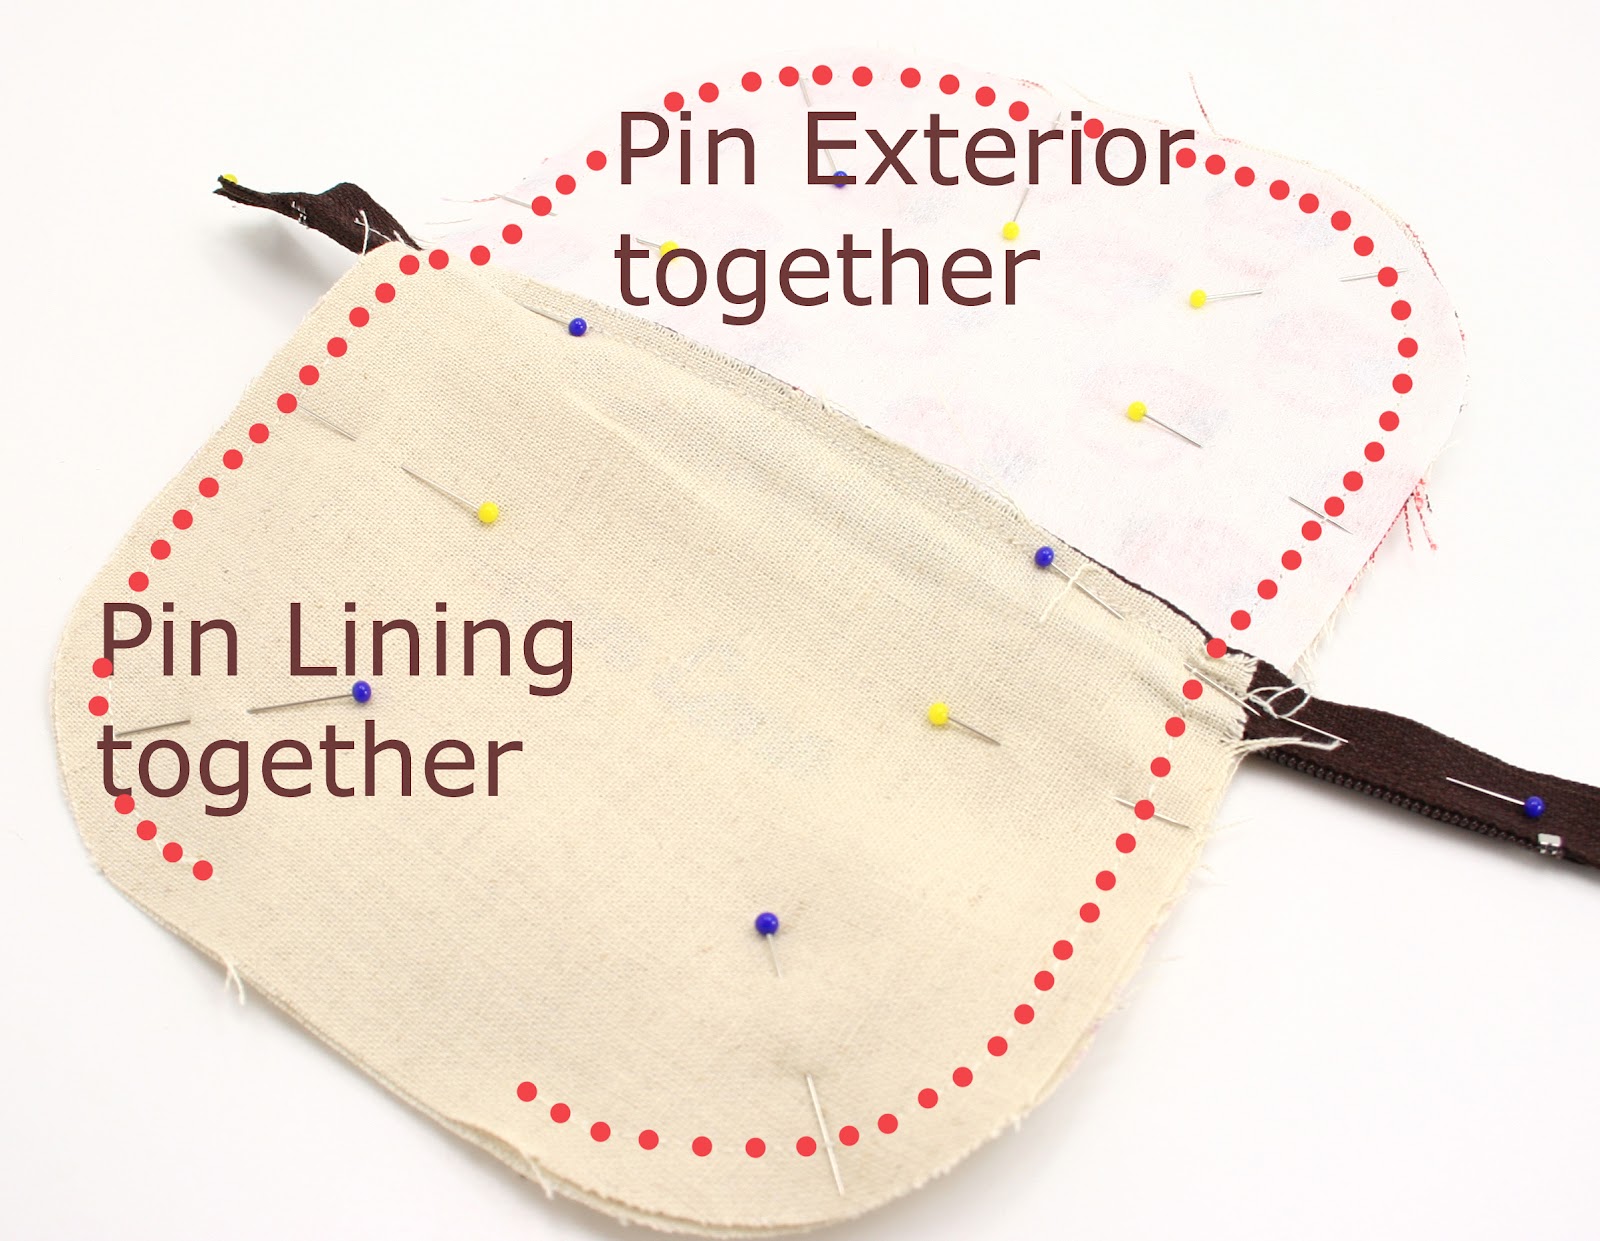
Tip: Sew slowly over the zipper, and try not to catch your needle on the pins as this is the place where your needle is most likely to break!
8. Remove the pins and trim off the excess fabric and zipper ends.

Through the gap turn the pouch right side out, then undo the zipper completely.

Sew up the gap in the lining fabric.
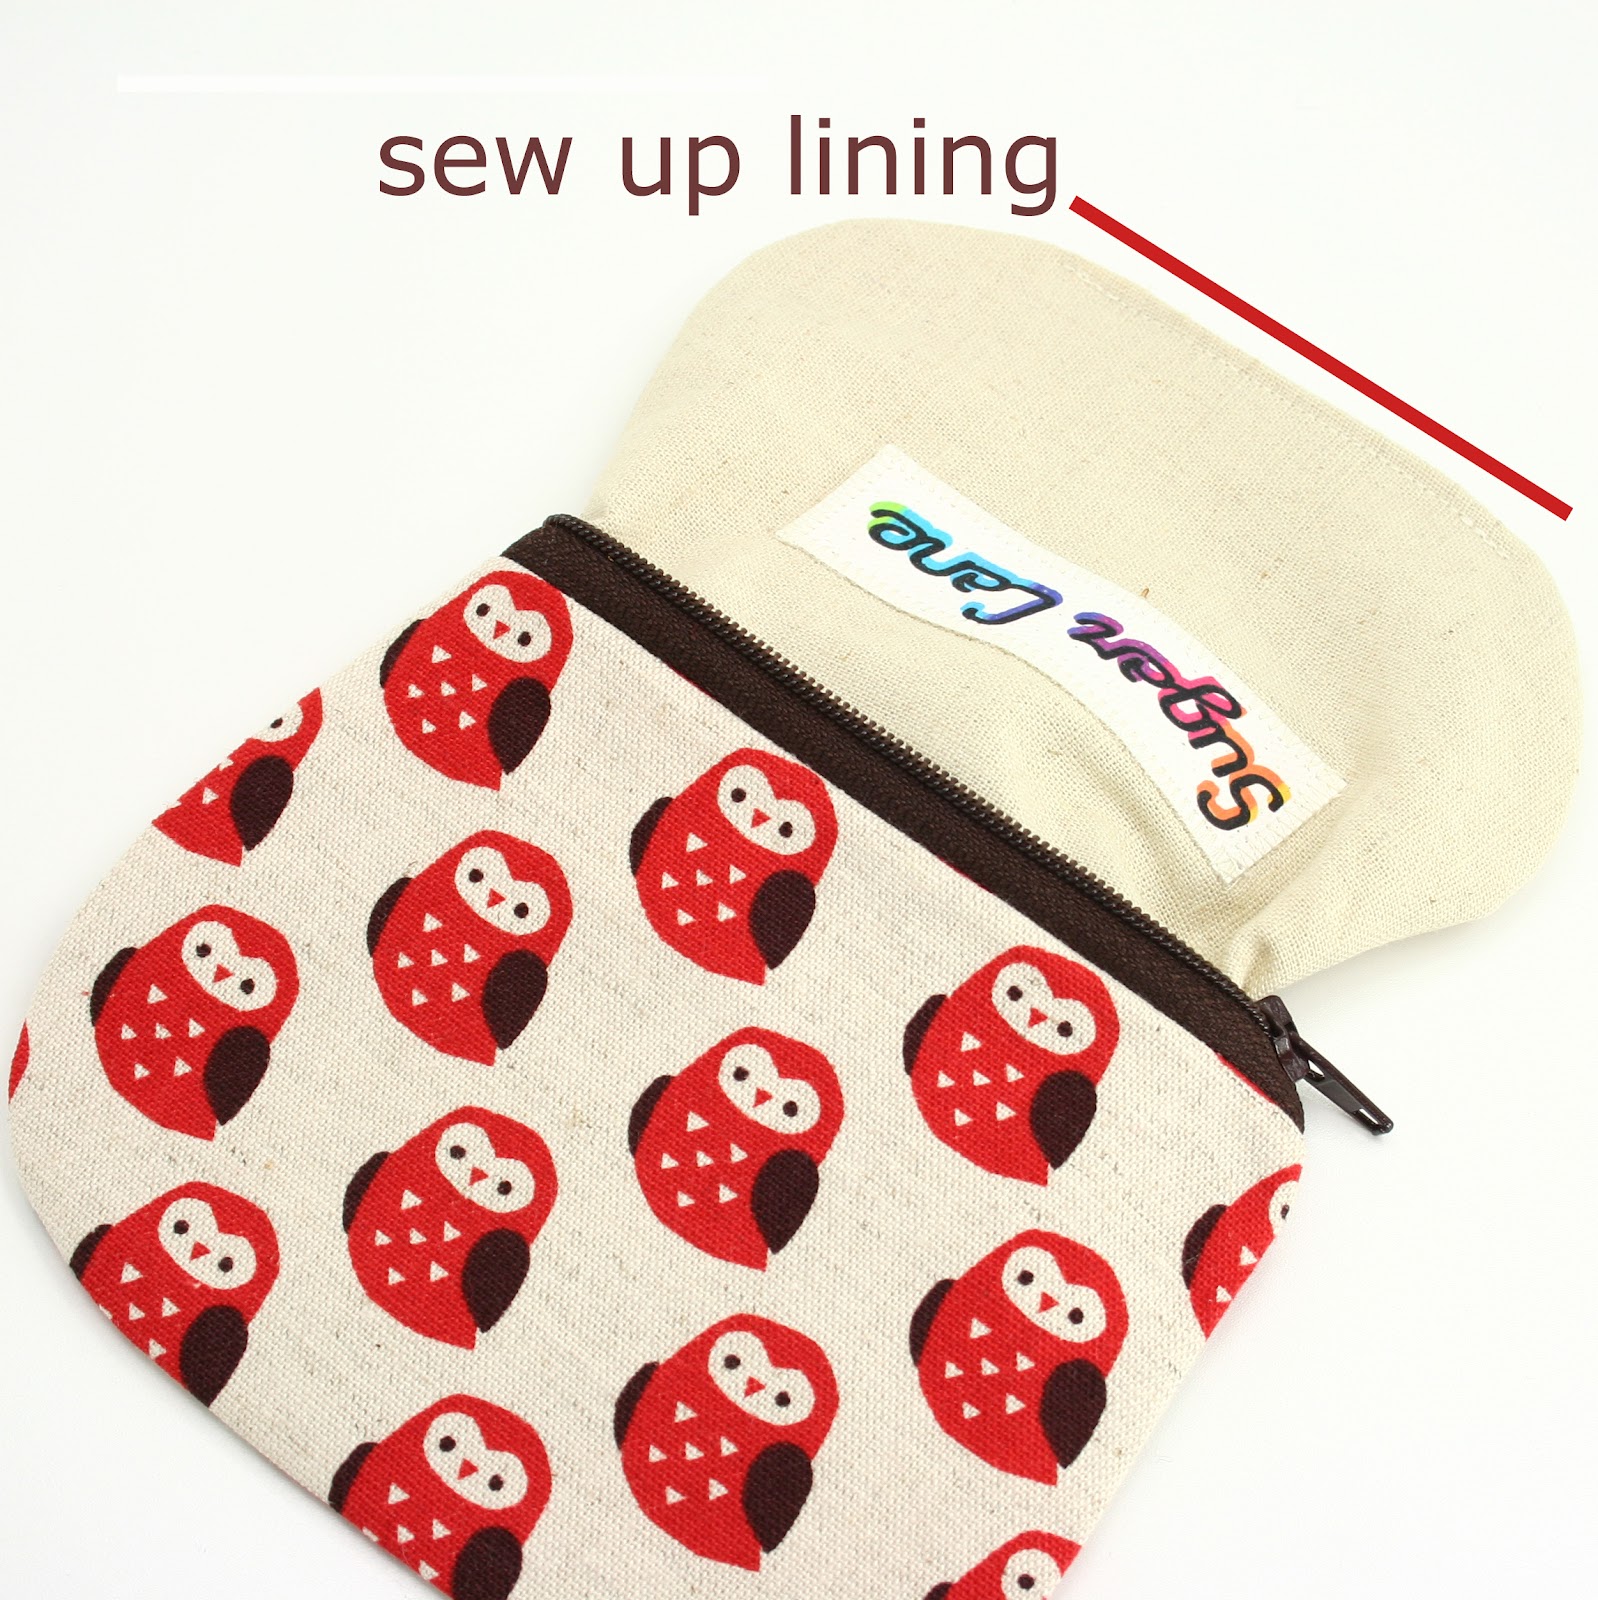
9. Before you put the lining into the pouch give it all an iron. Then put the lining in and iron the lining and outter fabric attched to the zipper, to give it a neat flat finish.

YAY!! there you go one beautiful handmade zipper pouch :D:D

List of Suppliers
♥ Interfacing : I use 'stitch and tear' stabiliser, I find with iron-on interfacing it can pucker up the exterior fabric when ironing. I attach the interfacing with wonderweb or other similar products at the top of the fabric only. Go to Barnyarns for a good deal on interfacing.
♥ Fabric : I buy a lot of my fabric from Etsy and the following online stores
I hope you have found this very helpful, please contact me if you have any questions.
If you would like to share your fabulous zipper pouch creations with me and others I have set up a Flickr Group for just that. I can wait to see the results :D
Have lots of fun :D
E xxx
Thanks for sharing, great tutorial!
ReplyDeleteYour very welcome :D:D:D
ReplyDeleteHi. This tutorial is amazing - it has very clear pictures and instructions. Especially on how to face the zipper teeth towards the lining! I have linked you on my blog: http://mel-allwrappedup.blogspot.com.au/p/link-love-to-amazing-free-craft.html.
ReplyDeletemel@allwrappedup
I so agree with your comments. This is a wonderfully detailed and clear tutorial. Thank you so much. I'll be using is as the basis to create many zippered items. Cheers, Monique
DeleteThank you so much for you lovely comments Mel :D:D
ReplyDeleteLove this thank you!
ReplyDeleteThis is the best tutorial. I love the fabric. Can't wait to make one of my own! Thank you!
ReplyDeleteWhat do you use to tack the fabric around the zipper? I am not familiar with that.
ReplyDeleteTo tack just means to put some big stitches in with a needle & thread to hold things in place, hope that helps :D:D:D
ReplyDeletethis is one of the most easiest way to learn how to make a small bag !
ReplyDeletefinally understand it !
THANK YOU !!!
Your very welcome, so glad to help :D:D
ReplyDeleteawesome tutorial!!
ReplyDeleteThank you OOO :D:D:D
ReplyDeleteGreat tutorial! I'm totally making this! What size fabric did you use? I have a 4" zipper.
ReplyDeleteEmma
Great tutorial and so clear (for a beginner!) what size fabric did you use, I have a 4" zipper?
ReplyDeleteEmma xx
Thank you so much Emma :D I use a 7" for all my small pouches which are about 5" x 4" in size. Let me know how you get on :D:D:D
ReplyDeleteVery nice tutorial. I've made many zippered pouches and I'm always looking for better techniques. Your tutorial includes nice extra detail. Thanks!
ReplyDeleteThank you so much Nancy you are very kind :D:D:D
ReplyDeleteFINALLY, the FIRST of many, many zipper pouch tutorials that I "get"-- I'm sooo excited!! Many thanks to you!!
ReplyDeleteALSO, I have a quick question for you regarding your cute little "Sugar Cane" tag. Did you make it, as well? And if so, do you mind sharing your secret?
Hello Kimberly :D Thank you so much for your lovely comment, I'm so glad to help :D:D Great idea about the tags that would make a super tutorial that I would love to share. I'll let you know when it posted :D:D:D
ReplyDeleteI Just made my first one based on your AWESOME instructions. You are the best. thank you soooooo much! I'm so excited :)
ReplyDeleteHey Brenda, hehehe that is so super duper :D:D YAY!! I'm so so happy, thank you :D:D
ReplyDeleteFirst time sewer, and I chose this for my first real project. Success! That means you definitely explained it VERY well :)
ReplyDeleteThank you so much for this wonderful tutorial. Turned out beautifully!
ReplyDeleteExcellent tutorial Emma. Thank you for sharing!
ReplyDeletethaks for the DIY
ReplyDeletehttp://payloog.com/?invite=465346